
Digital Photography -
Lighting

Digital Photography
Lighting

search
menu
/en/digitalphotography/getting-to-know-your-camera/content/
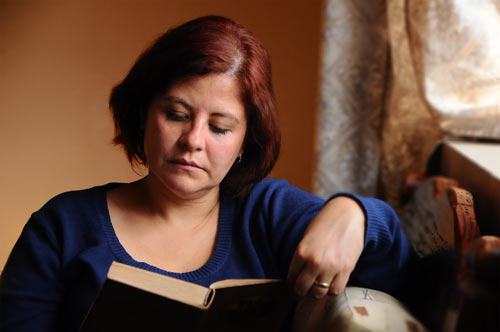
 A photo taken in natural light
Earlier, we talked about how your camera uses shutter speed and aperture to control how much light reaches the sensor. However, these settings are only part of the equation; the other part is the actual lighting. Lighting can come from the sun, your camera's flash, a lamp, or ceiling lights. The direction, brightness, and color of the lighting can have a dramatic effect on the appearance of your photos.
In any photo, the light will fall on the subject in a certain way, creating highlights (bright areas) and shadows (dark areas). The highlights and shadows create contrast, which can help to make the photo more interesting but can also create problems in some situations. For example, if you're taking a portrait you probably don't want your subject's face to be covered in shadow or overwhelmed by harsh light. You'll usually want a balance of highlights and shadows so your subject's features are clearly visible.
Cameras capture colors according to the available light and they can be changed by adjusting the color temperature. White Balance allows you to adjust and balance RGB colors (red, green, and blue) with black and white.
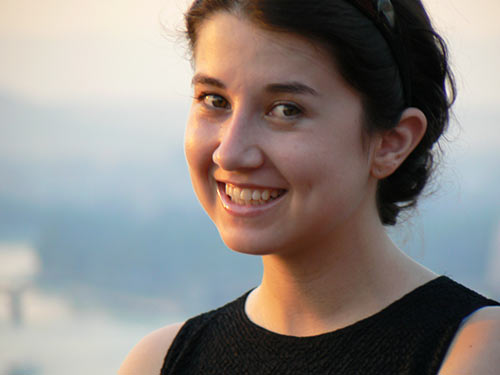
In the photo below, the subject's face has highlights and shadows, but they look natural and not overpowering.
 A photo with a good balance of highlights and shadows
On the other hand, if you want a dramatic photo, you may want more contrast. In the photo below, the photographer has used dark shadows to add an artistic touch to the photo.
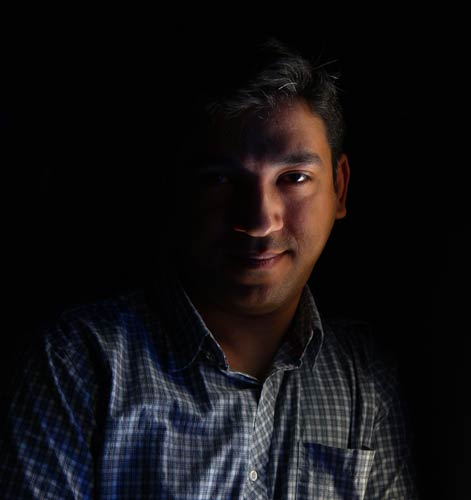 Using shadows for artistic effect
If you're taking photos outdoors during the daytime, your main source of light will usually be the sun. Depending on the time of day and the weather, the sun can give your photos a variety of "looks." Of course, good photo moments can happen at any time of day, so you may not be able to wait for the perfect light. If you are aware of how the light can affect your photos, you'll be able to make adjustments to get the best results.
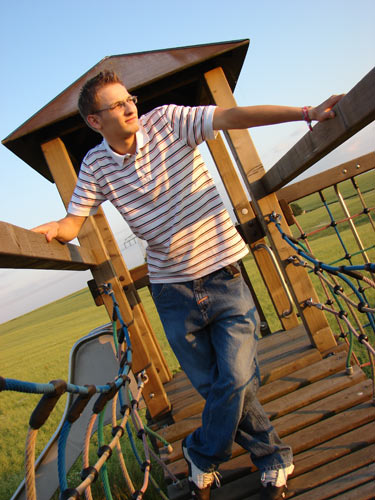
On bright, sunny days, having the sun behind your subject can cause the subject to look too dark. That's because the contrast is too high for your camera to capture accurately, so it adjusts the exposure to darken the entire photo. If this happens, try to find an angle where the background isn't as bright.
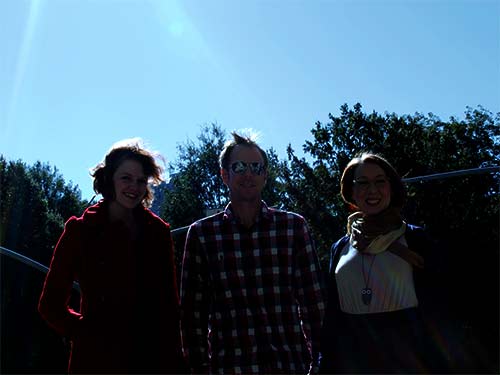 A photo with the sun behind the subjects
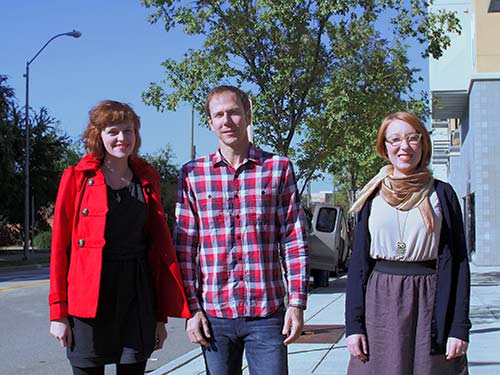 A photo with the sun to the side of the subjects
Many photographers actually use their flash on sunny days to reduce unwanted shadows. This is known as fill flash because it "fills in" the shadows with additional light. You should only use fill flash when you notice problematic shadows; in other situations, flash may make the photo look worse.
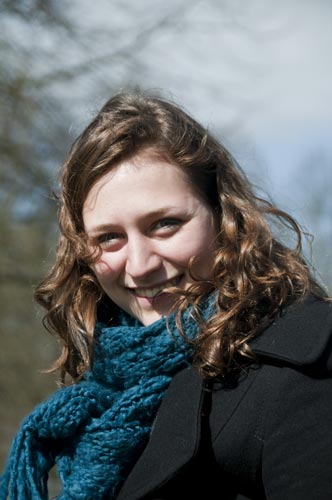
Many photographers find that their photos look best when taken just before the sun sets, or just after it rises. This is commonly known as the "golden hour". Since the sun is lower in the sky, it creates longer, softer shadows. These shadows can add contrast to your photos while still giving them a soft, pleasant appearance. In addition, the sunlight has a more golden color, which adds warmth to your photos.
In the photo below, the subject's face has highlights and shadows, but they're not too harsh.
 The "golden hour"
Around the middle of the day, the sun is higher in the sky, so it will shine down on your subject. This can create dark shadows and bright highlights, which can give your photos a harsher appearance. If you are taking photos of people, their eyes may be completely in shadow. Sometimes, you may be able to reduce these shadows by turning on your camera's flash, although this won't work if your subject is too far away. You can also ask your subject to face a different way to try to reduce the shadows.
In the photo below, you can see bright highlights on the subject's forehead, while her eyes and mouth are mostly shadowed.
 Midday
The softest light occurs when the sun is covered by clouds, or when it's just below the horizon. Because the light is soft, your camera will be able to pick up details that may have otherwise been covered by shadows. This can also be a very good time to photograph flowers and other colorful objects.
In the photo below, the lighting on the subject's face is very even, with no harsh highlights or dark shadows.
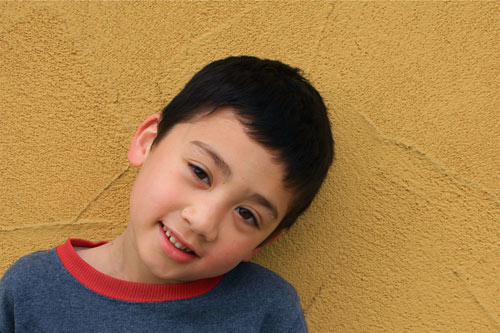 Cloudy weather
 An indoor photo
For indoor photography, your light sources can include lamps, ceiling lights, sunlight through a window, and your camera's flash. This gives you more flexibility, as you can move lights or turn them on or off to control the direction and brightness of the lighting.
Generally, the more light you have, the better your photos will turn out. However, you'll also need to think about the quality of the light, as some types of light are more flattering than others.
You may be tempted to use the flash for all of your indoor photography, but pictures taken with flash often have dark shadows and bright highlights that can be harsh and unflattering. You may want to try turning off the flash and working with the other lights you have. You can turn the flash back on if you find that your pictures aren't coming out.
In the photos below, the left photo was taken with the camera's flash, which causes harsh shadows to appear behind the subject. The right photo was taken without flash, which gives the photo a more natural look.
 A photo taken with flash
 A photo taken without flash
In professional studio photography, there will usually be a primary light (often called a key light), which is located off to the side but still in front of the subject. There can also be a second light called a fill light, which is located on the other side of the subject to help reduce shadows. Sometimes the photographer will use other lights as well. This type of lighting setup will usually cost hundreds or even thousands of dollars.
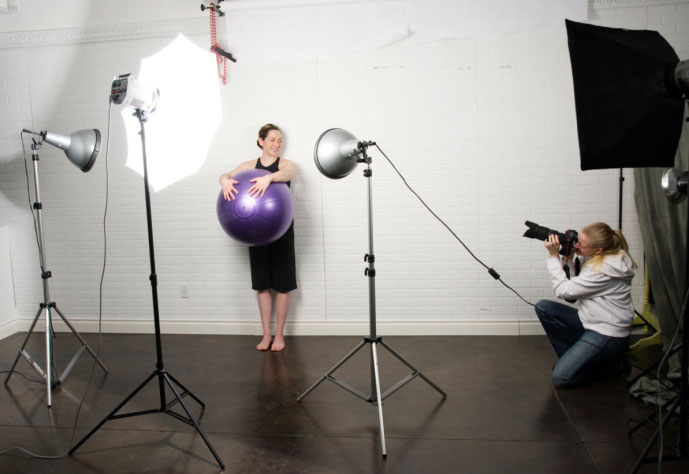 A professional lighting setup
If you're not a professional photographer, you probably don't have these types of lights. However, if you have lamps or a sunny window you can still position your subject to make the most of the lights you have. Here are a few tips you can use to take better indoor photos:
 Natural light coming from the side
/en/digitalphotography/composing-your-shot/content/