
Access 2010 -
Creating Forms

Access 2010
Creating Forms

search
menu
/en/access2010/modifying-tables/content/
Creating forms for your database can make entering data much more convenient. When you create a form, you can design it in a way that works with your database and makes sense to you.
In this lesson, you will learn how to create and modify forms. You'll also learn how to use form options like design controls and form properties to make sure your form works exactly the way you want it to.
Wewill be showing you how to create forms with examples fromour sample bakery database. If you would like to follow along, download our example and use it to follow the proceduresdemonstrated in this lesson.
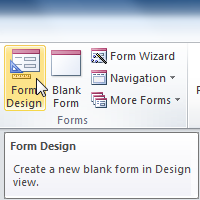
Access makes it easy to create a form from any table in your database. Any form you create from a table will let you view the data that's already in that table and add new data. Once you've created a form, you can also modify it by adding additional fields and design controls such as combo boxes.
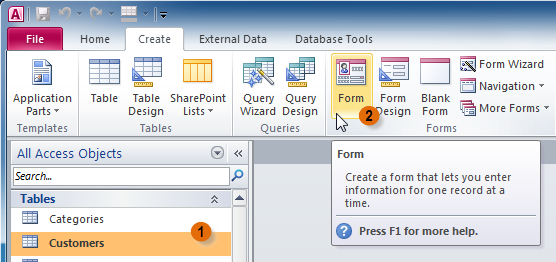 Using the Form command to create a form from the Customers table
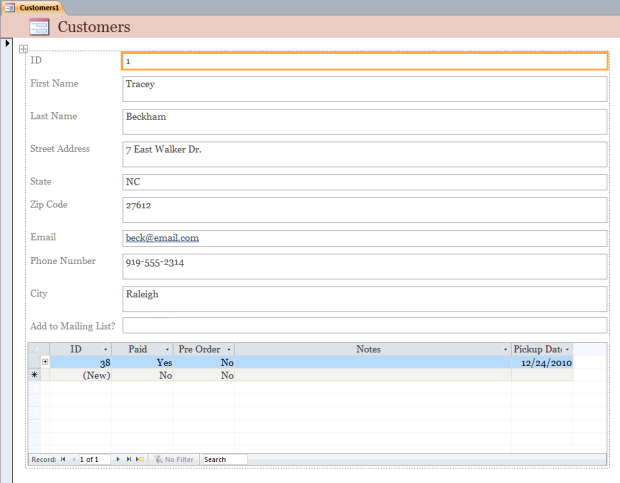 The new form
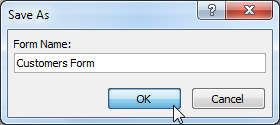 Naming and saving the form
If you created a form from a table whose records are linked to another table, your form probably includes a subform. A subform is a datasheet form that displays linked records in a table-like format. For instance, the subform included in the Customers form we just created displays linked customer orders.
We probably don't need to include this subform because we just want to use the Customers form to enter and review contact information. If you find that you don't need a subform, you can easily delete it. Simply click it and press the Delete key.
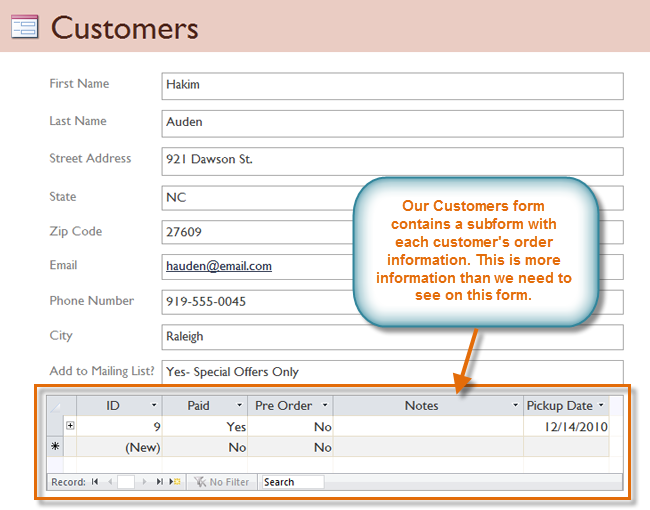 An unnecessary subform in our Customers form
However, subforms aren't always useless. Depending on the content and source of your form, you might find that the subform contains useful information, as in the example below. In our Orders form, the subform contains the name, quantity, and price of each item contained in that order, which is all useful information.
 Our Orders form, which includes a useful subform
When you use the Form command on an existing table, all of the fields from that table are included in that form. However, if you later add additional fields to that table, these fields will not automatically show up in existing forms. In situations like this, you can add additional fields to a form.
 The Add Existing Fields command
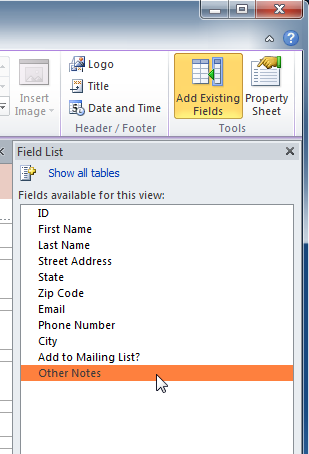 Selecting a field from the source table
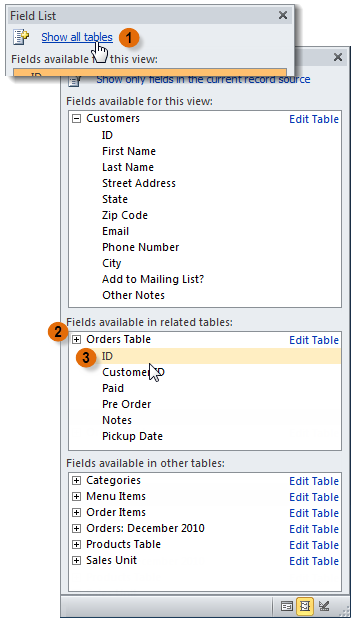 Selecting a field from another table
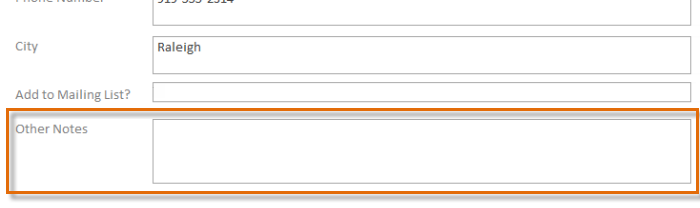 The added field
You can also use the above procedure to add fields to a totally blank form. Simply create a form by clicking the Blank Form command on the Create tab, then follow the above steps to add the desired fields.
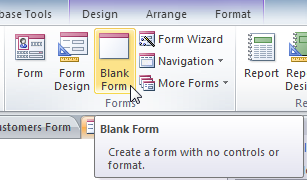 The Blank Form command
Design controls set restrictions on the fields in your forms. This helps you better control how the data is entered into your forms, which in turn helps keep your database consistent.
A combo box is a drop-down list you can use in your form in place of a field. Combo boxes limit the information users can enter by forcing them to select only the options you have specified.
Combo boxes are useful for fields that have a limited number of possible valid responses. For instance, you might use a combo box to ensure people only enter a valid U.S. state while entering an address, or that they only choose products that already exist in your database while placing an order.
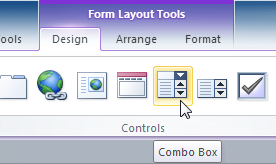 The Combo Box command
 . Move the cursor to the place where you want to insert the combo box, then click. A yellow line will appear to indicate the location where your combo box will be created.
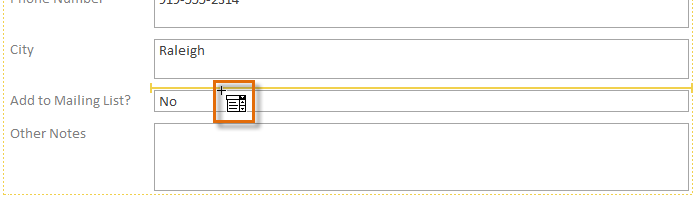 Selecting the location of the new combo box
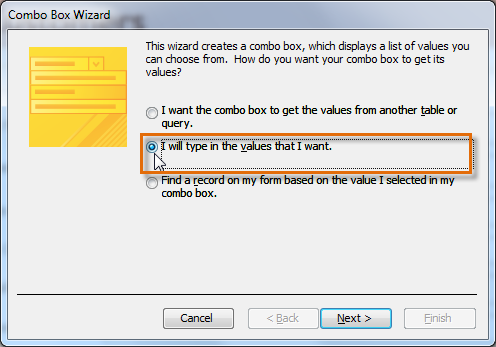 The Combo Box Wizard dialog box
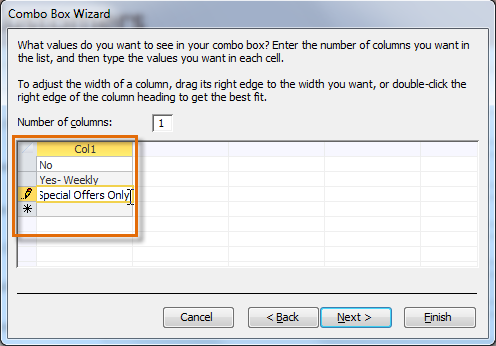 Choosing how many columns to include in the combo box's drop-down list, and typing the options that will appear in that list
 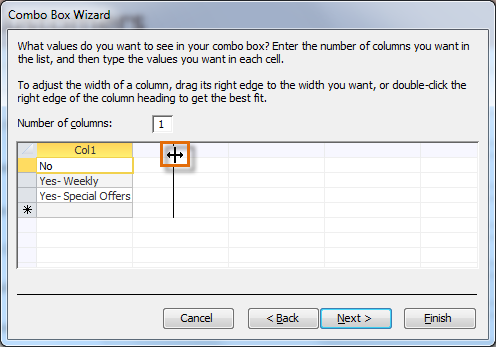 Resizing the column that will appear in the combo box
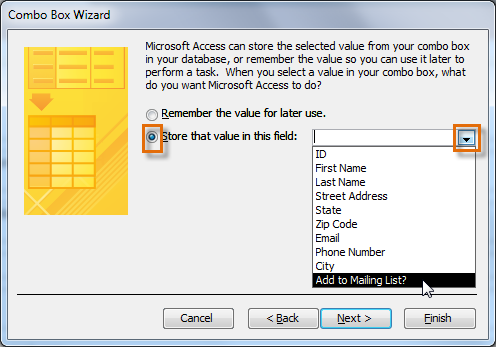 Selecting the field that will be affected by the combo box—choices made while using the combo box will be recorded in this field
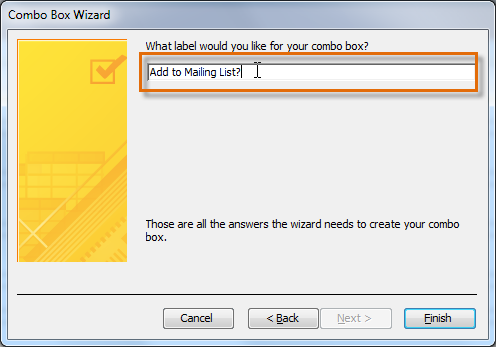 Naming the combo box
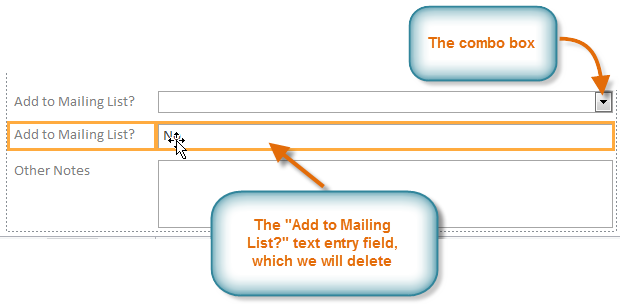 Deleting the field which the combo box replaces
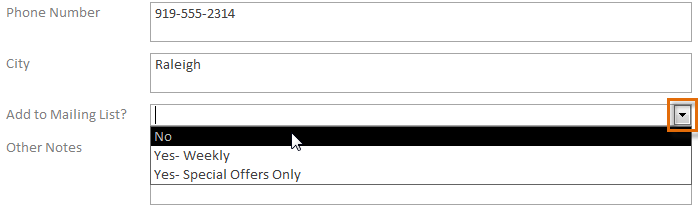 Testing the combo box in Form view
If you want to include a drop-down list with a long list of options and don't want to type all of them out, create a combo box and choose the first option in the combo box wizard, I want to get the values from another table or query. This will allow you to create a drop-down list from a table field.
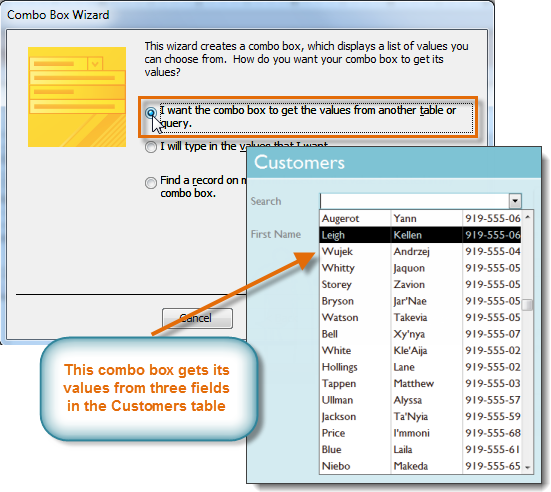 A combo box that takes its values from a table
Some users report that Access malfunctions while working with forms. If you have a problem performing any of these tasks in Layout view, try switching to Design view.
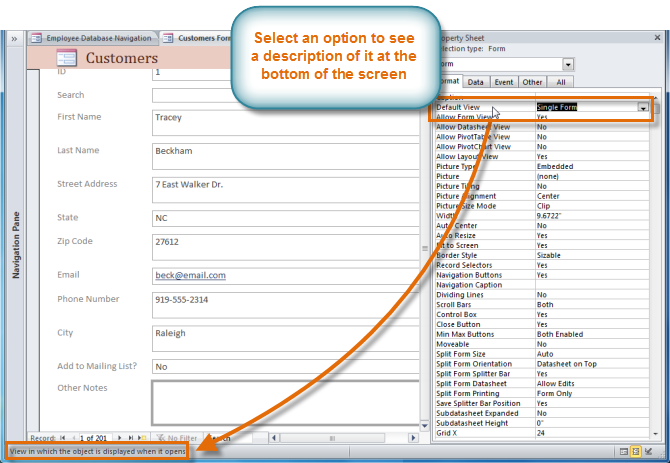
The Property Sheet is a pane containing detailed information on your form and each of its components. From the Property Sheet, you can make changes to every part of your form, both in terms of function and appearance.
The best way to familiarize yourself with the Property Sheet is to open it and select various options. When you select an option, Access will display a brief description of that option on the bottom-left border of the program window.
Watch the video to learn how to use the Property Sheet to change form settings.
 Selecting a Property Sheet option to find out what it does
Pay close attention as you modify your form and its fields. It's possible to make subtle changes with the Property Sheet. Because there are so many options, it can sometimes be challenging to remember which one you used to modify each aspect of your form.
There are far too many options in the Property Sheet to discuss them all in detail. We'll review two useful ones here: hiding fields, and setting fields with dates to automatically fill in the current date. Practicing these procedures should give you a sense of how to work with other Property Sheet settings as well.
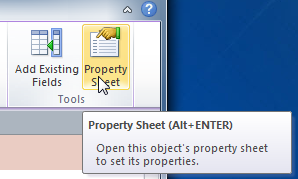 The Property Sheet command
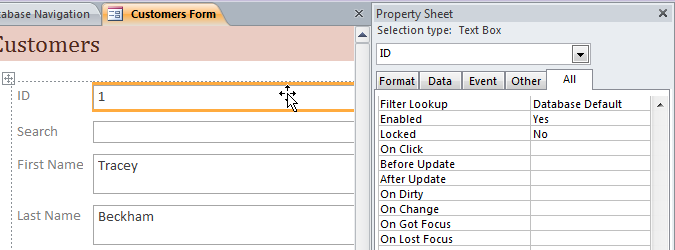 Selecting the field we wish to hide. Note that the Property Sheet is open in a pane on the right.
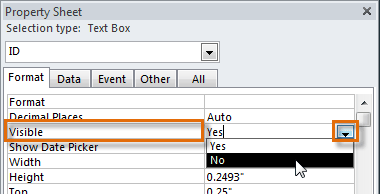 Selecting "No" from the drop-down list in the Visible option
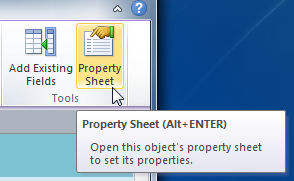 The Property Sheet command
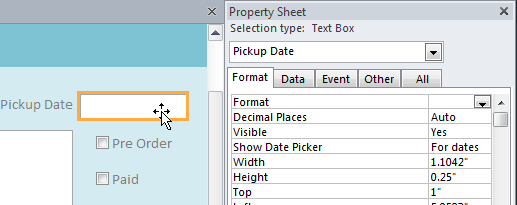 Selecting the date field
 that appears in the column to the right.
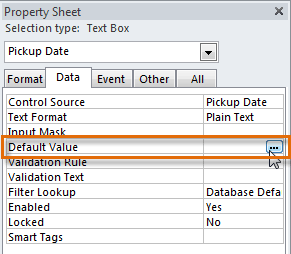 Clicking the Expression Builder button for the Default Value option
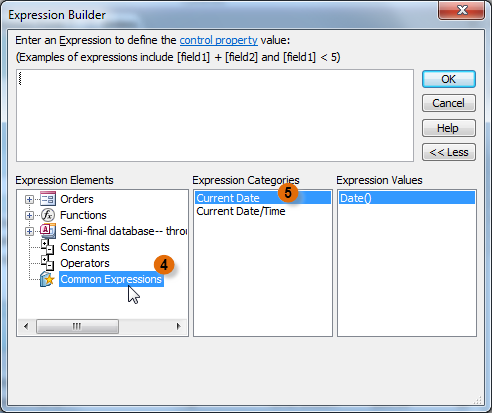 The Expression Builder dialog box
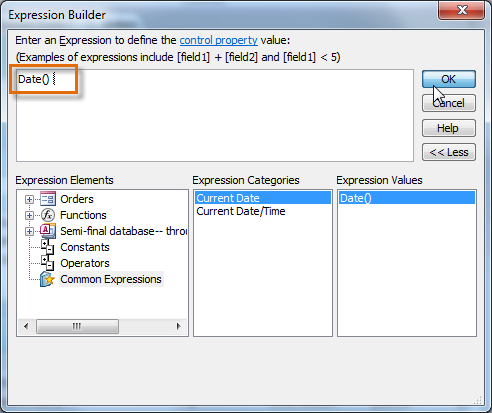 The Current Date expression
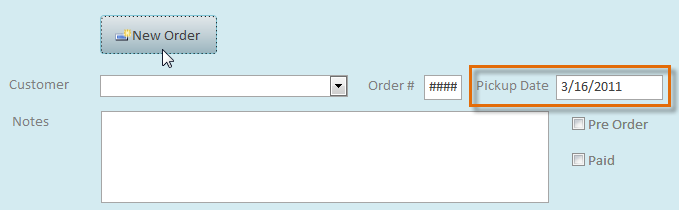 The current date is automatically entered into the Pickup Date field when a new record is created
/en/access2010/formatting-forms/content/